How to prepare for a professional photo shoot (+ a free guidebook)

Psst, you can save this article for later by pinning it!
When you look on someone's Facebook timeline, Instagram feed, Pinterest boards, or website that draws you in and makes you want to click around, what's the thing that stands out the most? Amazing photos. When you're searching high and low for a website template to use, what usually attracts you to one over the other? The amazing, colourful photos they use in the preview template (nevermind the fact that the photos aren't yours ... they're just so pretty!). You might be building your first website, re-branding an old one, or changing businesses completely, but there's one thing you're going to need: a professional photo shoot.
My first photo shoot was done by a local photographer friend in late 2011. I picked out 3 different outfits, did my hair and makeup myself (it's kind of painful to see that I was growing out a pixie cut, worse time for a photoshoot ever!), and baked some cupcakes that I was going to ice during the shoot.
Wait, what? Why would a holistic nutritionist be icing cupcakes in photos for her website?
Well, they were gluten free, soy free, vegan cupcakes with a homemade buttercream icing, and my new website was called lovewhatyoueat.ca. I was going to focus on people with food allergies (like me!), and teach them that no matter what they could eat, they should be able to love what they eat.
The idea was a good one (or so I thought), but anyone seeing those pictures would have thought I was a home baker or something. See?

P.S. I have no idea if the little candy hearts on top were gluten free or not. #brandingfail
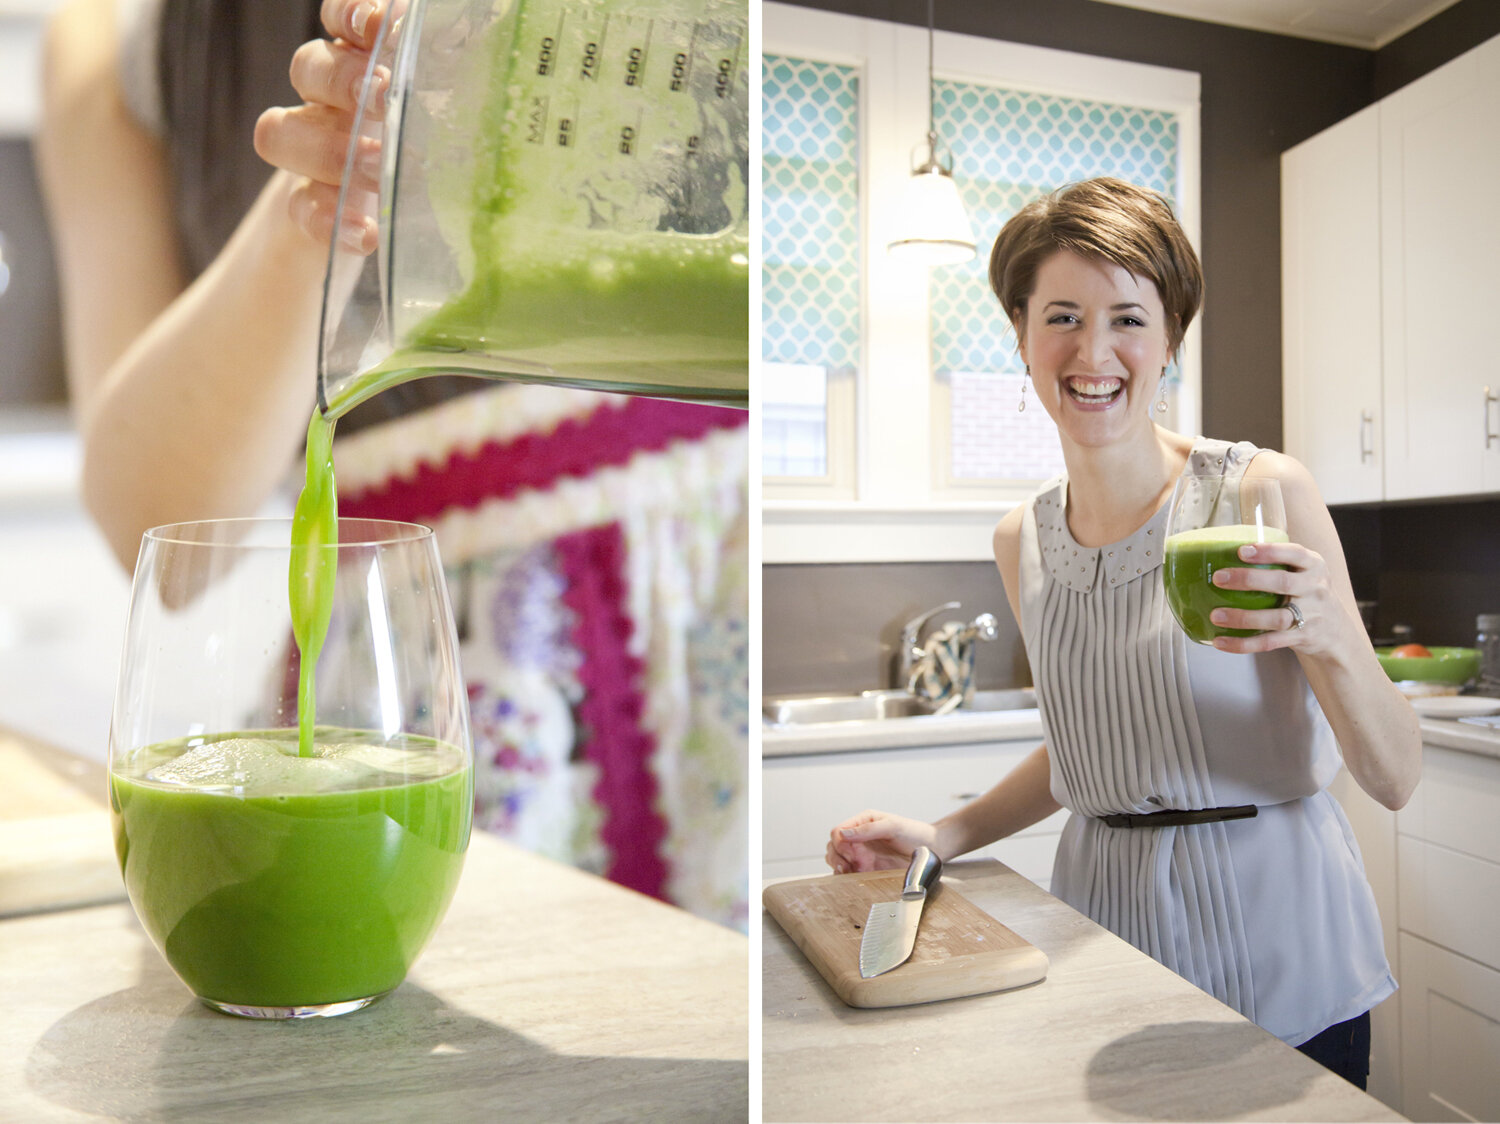
I also made sure to get the holistic nutritionist requisite shot of me making green juice ... even though my body hates green juice and I don't teach juicing with my clients. Yeah, that picture was a true representation of my business at the time. NOT.
I actually remember saying to myself "I hate juicing, I don't juice, I don't tell my clients to juice, but it'll add some colour to my website, it looks healthy, and everyone else juices, so why not?!". Now that was not being authentic to who I am, was it?
Oh, and don't forget those super awkward "professional" head shots. Because every online entrepreneur needs a picture of themselves in a blazer looking like they have a stick up their ass. Obviously.

These pictures literally make me laugh out loud now, since I remember how poorly planned it all was, and how out of control and awkward I felt that entire day.
I planned my outfits, made the cupcakes, and had the ingredients to make the green juice, but that's as far as it went. I had no idea what I was going to DO with the pictures, or if they would relate at all to my website other than the mission behind them of loving what you eat no matter what you can eat.
However, for a first try at a professional photo shoot it wasn't too bad, and only cost me like $150 for the entire shoot (I told my friend to raise her prices when we were done!). I used those photos for everything they were worth over the next 3 years until I had my big-girl photoshoot in 2014.
That's when OCD-Type A-Planner Ashley took over, and it was a good thing that she did because I spent $3,729 on that photoshoot ... which was more than 2 times more than what we spent on our wedding photographer!
If I was going to invest in a real (and real expensive) photo shoot, complete with makeup and hair people, I was damn sure going to make it count. However, there were still things that I missed out on that 2 years later I wish I had done.
If you're ready for a professional photo shoot for your business, here are 7 things to keep in mind to make sure you get your money's worth:
1. Design a colour scheme ahead of time
Like Stacie and Clinton said all the time on TLC's show What Not to Wear:
It doesn't have to match, it has to go!
Your clothes, makeup, backdrop, and food don't have to exactly match the colours of your brand, but you definitely don't want them to clash.
If you don't know what colours your brand and website are going to have, then don't book a professional photo shoot. I repeat, if you're not taking your business seriously enough to have picked a few colours to represent it, then do NOT invest hundreds or thousands of dollars on a photo shoot.
Do you want to help people with anxiety to feel calm? Then don't wear red, it's too aggravating.
You have to know who you're trying to attract before you try and figure out anything visual for your business, photos included.
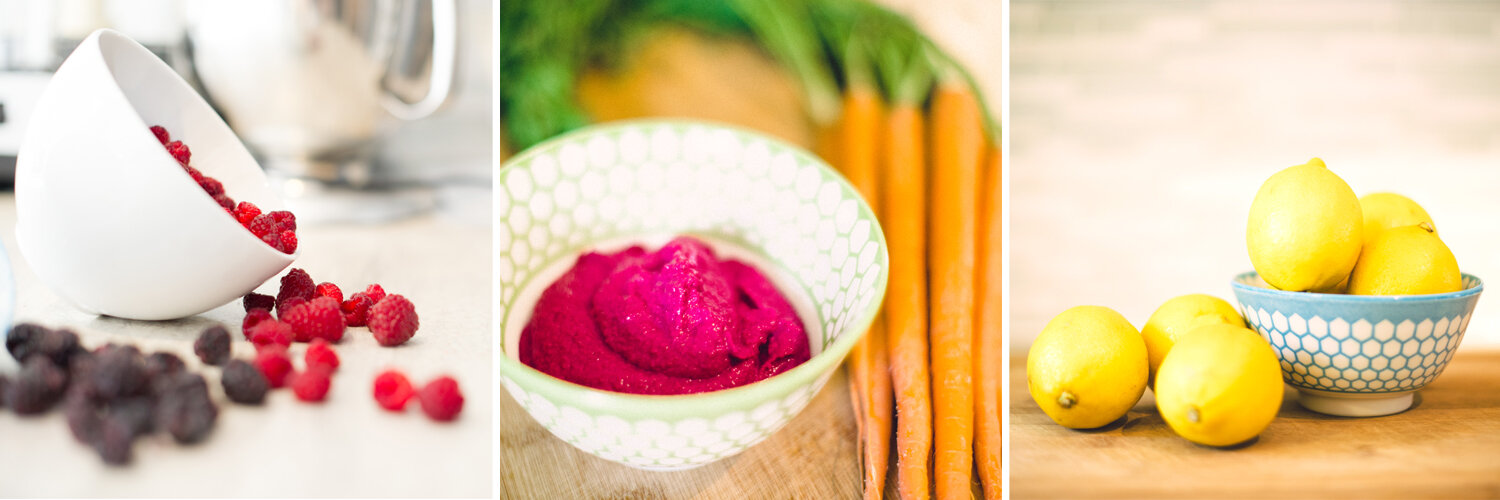
Here's an example of the feelings that I want my ideal clients to experience when they come to my website, the resulting colour scheme, and some images from my professional photo shoot:

And of course the food we photographed matches my colour scheme, too! I especially made the roasted beet hummus to get that pop of bright pink.
Don't be afraid to share your brand words with your photographer. They'll know how to make a photo shoot look light and happy versus bold and serious with lighting and exposure. They're pros, after all.
2. Get a mix of candid AND posed shots
Candid and posed photos can be used in totally different ways on your website and in your business, but you're going to need both.
You can use candid shots for making pins for Pinterest, posting the raw, behind the scenes photos on Facebook and Instagram, and using them for full width pictures and banners on your website.
You'll need more traditional posed photos for your about page, sidebar, social media profile pictures, webinar sign-up pages, guest posts that you write for other websites, and anywhere else where someone might be needing your bio.
I absolutely hate having posed photos taken of me, but they're a necessary evil now that I'm holding joint webinars with other business owners, guest posting, and taking part in various online chats.
All you need is one really good headshot of you looking directly at the camera that you're proud to share so that you can have one consistent picture across all social media platforms, commenting services (like Disqus), and networking websites (like Slack).

3. Have both real life and solid backgrounds
Solid backgrounds are something that I didn't plan on capturing, and I'm really sorry that I didn't! Sometimes you just need a photo of yourself with a solid background so that you can easily put text over it.
The solid background could be plain white or coloured, but be sure to capture at least a few shots of yourself with various facial expressions and body poses so that you can use these for marketing images.
Your photographer will know how to do this with a drop sheet background or you can use a solid wall, just be sure that it's smooth. 12 months or 2 years down the road when you want to use an image for a webinar sign up page (like I just did for the launch of my online course, you'll see the stock image that I had to use instead below), you'll have one waiting.
For the record, I did get some shots of me with a solid background ... but what can I say, I look like a dancing fool! FYI: the background is just a wall in our dining room that is painted a neutral colour.

Below is an example of what you can use pictures with solid backgrounds for. That is a landing page for one of my most popular pins, and it offers them a choice of signing up for some free recipes (in exchange for their email) or to go directly to the blog post for the corresponding article that was referred to on Pinterest.

4. Get both portrait and landscape oriented shots
Photographers generally feel most comfortable when the camera is horizontally sitting in their hands. However, this is going to give you a whole bunch of wide, landscape style photos. At some point you're going to need some portrait style shots as well.
When you're coming up with your list of shots that you want to get, make an additional note beside it if you need it in a specific orientation of portrait or landscape. For instance, if you know that you want a specific shot as a header on your website, it's going to look best as a landscape shot like this one:

If you're creating a landing page for you website, you might need a portrait style photo, like I use in the landing page for my course opt-in:

You can't blame your photographer for not getting a specific orientation if you didn't tell them, they're not mind readers! And if you think you'll just try to turn a landscape into a portrait, forget about it, since you end up cutting half the picture off.
5. Plan out 6-12 months of marketing and capture a photo for each one
The #1 reason that I wanted to do a super professional photo shoot is that just one month after the shoot I had already planned on launching my 30 Day Calm Mom Challenge and 8-week online program called Mama Mojo.
To market the Calm Mom Challenge, I wanted to have a picture that captured the challenge of the day that I could share on Facebook and Instagram ... which means that I had to come up with the entire challenge an entire month BEFORE it was due to go out so that I could give the list of shots to my photographer.
I spent a few hours brainstorming my 30 individual challenges, made a quick note beside it what kind of picture could represent it, and gave the list to my photographer.
I ended up with 30 beautiful images to use in the private Facebook group (since not everyone was checking their emails as they were going out weekly), and also I shared a few of them throughout the 30 days on my public social media pages inviting people to join us even though the challenge had already started.

Taking that idea a step further, if I was really organized I could have come up with my blog post topics for the next year and gotten a picture to represent those so that I could have made a Facebook and Pinterest image for each post. Obviously this was before I started using a blog editorial calendar, as this would have made things infinitely easier. Lesson learned (you can get your own free copy of my one-year blog topic planner by clicking here).
Even though I didn't match up my professional photo shoot to my blog editorial calendar, I was still able to use a few of my images for my current Pinterest pins.

6. Make a list of shots that you absolutely need and give it to your photographer
When I started making a list of pictures we had to get during the shoot, I was worried that my photographer would think that I was high maintenance and demanding. It turns out she was excited!
She actually said that she wishes all her clients were as organized as I was, as it makes her job infinitely easier. While I was getting my hair and makeup done, she was able to get a head start on some of the shots.
If at any point during the day we felt behind schedule, we could just consult the list to see how many more shots we needed.
We all ended up feeling both focused and relaxed knowing that we were getting everything we needed, especially considering that the photographer was from out of town and there was no day 2!
7. Don't forget to go with the flow
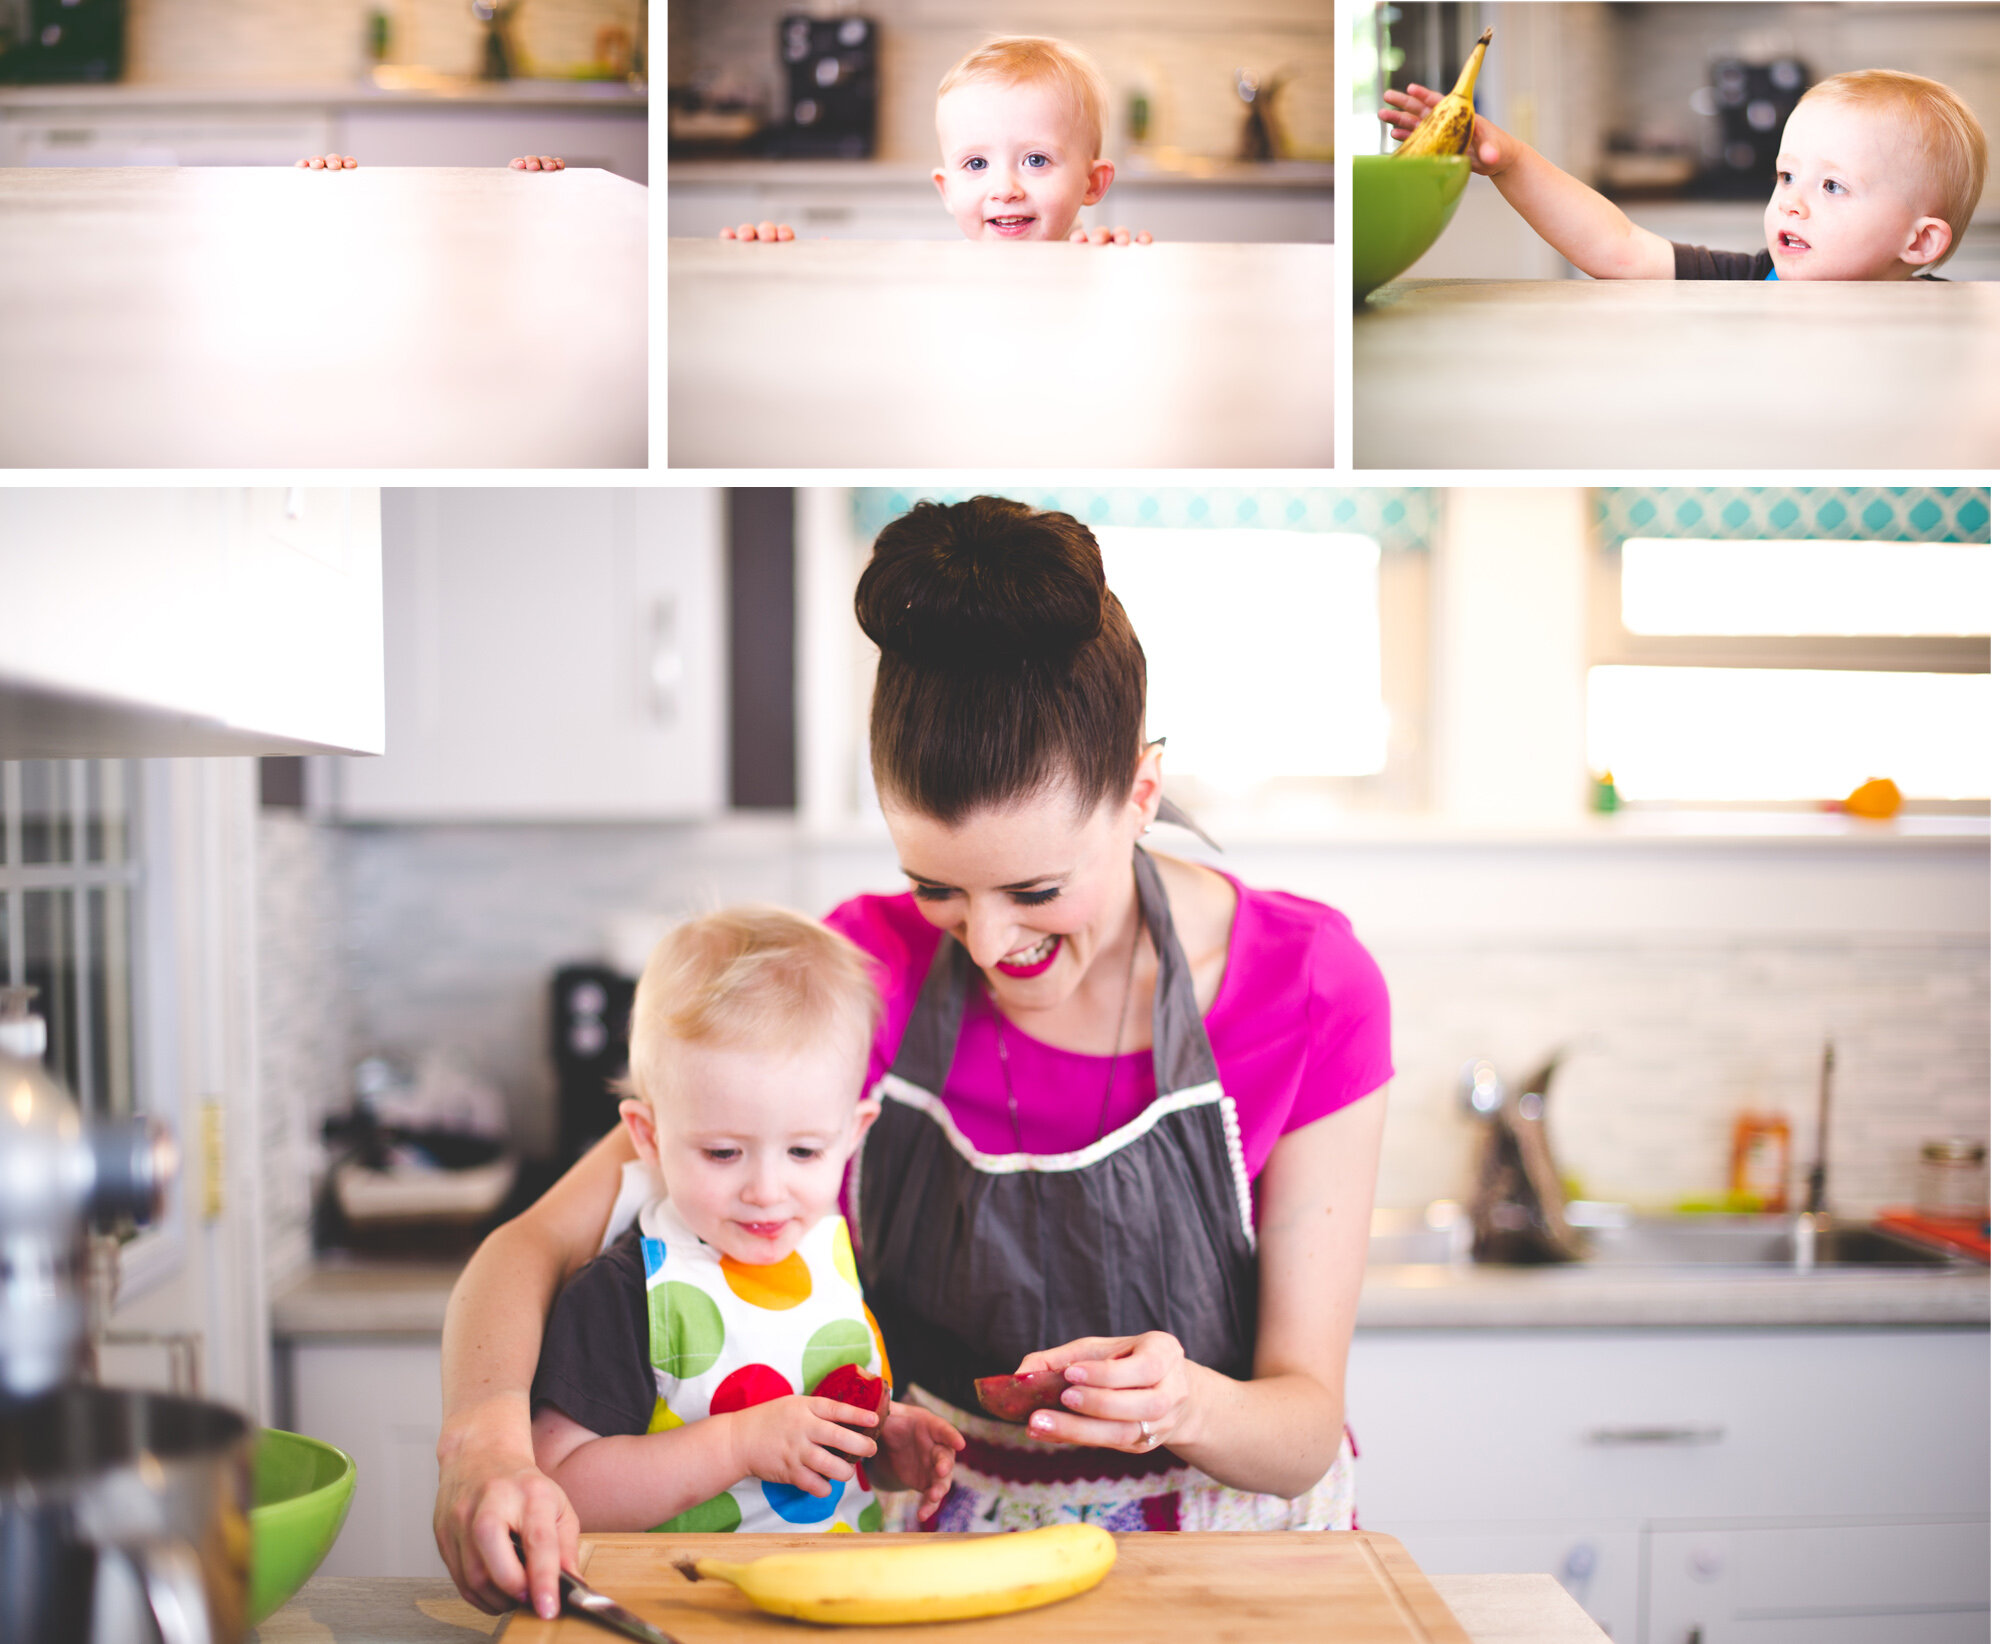
The amazing thing about having a professional photo shoot is that it's equal parts organization/planning and being in the moment. You can have all your shots planned out, but you have to make room for those snippets of time when magic is happening in front of the camera.
Maybe the lighting is absolutely perfect for just a few moments, or maybe your photographer is capturing an emotional moment between you and your kids who came in for a few shots.
Remember that you'll get the best photos when you are in the moment, 100% present, and connecting with your surroundings and the photographer. They are just as much of an artist as you are in this project, so let them work their magic and direct you to get the best shots.
I'll remember having my almost 2 year old son in these shots for a very long time. 😭 Remember that my website's tagline was "Helping busy moms with their real food on", so we figured they'd want to see that I was actually a mom.
Whew, so that's a lot of information at once, and if you're prepping for our first professional photo shoot, you might be thinking "good God, what have I gotten myself into?!".
You don't have to think of all these things if you don't want to, they're just prep that I found to make the day go a LOT more smoothly, and other things that I wish I would have done in hindsight.
If you're stressing about all this, then let me use my Type-A skills to make your life easier and get your money's worth out of your special day.
The free guidebook below outlines everything you need to prepare for your upcoming professional photo shoot, including:
how to pick outfits that will pop in your pics
the top 10 solid background poses for the most flexibility in your future marketing
how to use Pinterest to bring your photo shoot vision to life before the big day
the 7 things you need to do the night before so your day runs smoothly
the essentials you need the day of for a flawless photo shoot

So, did that expensive professional photo shoot feel any different than my $150 one? Or, for that matter, did it feel different than our wedding photo shoot? Heck yeah!
That day, I felt like a princess mixed together with the powerful, in-charge business owner that I was growing into, and it totally shows.
When people land on my website, there's no way in hell they think I'm just trying out this business thing. Those branded pictures from my big-girl professional photo shoot have earned me thousands of dollars that I didn't even realize you could miss out.
They've allowed me to be taken seriously as a business owner, attract exactly who I want to work with, and earn the trust of my ideal clients faster when they land on my website or social media.
If you're waiting for the right time to invest in a high-quality professional photo shoot, it's kind of like having a baby. There's never a right time, so you might as well do it because it's going to be one of the best things you've ever done. However, unlike having baby, a professional photo shoot will go much more smoothly (and maybe even according to schedule!) if you're organized in advance and have a plan for the day.


